Site Preparation and planting
This section describes the process of site preparation, both what needs doing and when it needs doing.
Preparing a site well for revegetation will improve plant survival and mean less work in the first six to twelve months after planting a site.
There are local resources available for some areas – ask the nursery, Landcare and/or your local regional natural resource management organisation.
Planting
Planting involves logistics, whether planting yourself, planting with friends or community groups or employing a contractor.
- Finish site preparation.
- Site must be stock-proof, even if the fencing is not finished.
- Set the date for your planting team.
- Organise delivery or pick-up of the plants must be organised.
- Your planting plan must be prepared, e.g., the spacing between plants, spacing between trees and shrubs, which species are for different areas of the site. Remember how you calculated your numbers – what density did you use?
- Tools and equipment must be prepared.
Planting and direct seeding can be really fun and a great family and community activity. Take time to prepare this as a celebration or event with friends and family participating, great food and periods of rest to socialise.
Planting tools
For sites that are ripped and well prepared, the pottiputki or Hamilton tree planters are efficient and highly effective (see images for using these tools). Be careful when using planters in wet soil. You want to avoid creating a smooth impenetrable surface next to the root ball, which can be caused by sliding the beak of the pottiputki across wet soil. When the soil dries out it becomes almost impossible for roots to break through this wall.
For sites that are not ripped (e.g., when planting seedlings into sites with good existing native cover and where you wish to have minimal disturbance) shovels and planting spades are best, as you can create a fine tilth that will also support good root to soil contact.
Mechanical Tree/ vegetable planters may be an efficient labour saving option in very large revegetation projects where soil type, seedling size/type are appropriately matched to machinery type, and soil tilth preparation is appropriate. Seek advice from experienced contractors .
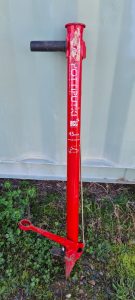
Pottiputki® tree planter. Photo: HLN
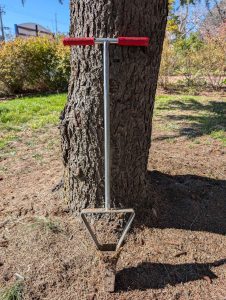
Hamilton tree planter. Photo: MLI
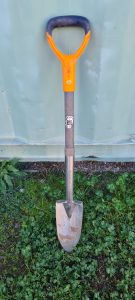
Planting spade. Photo: HLN
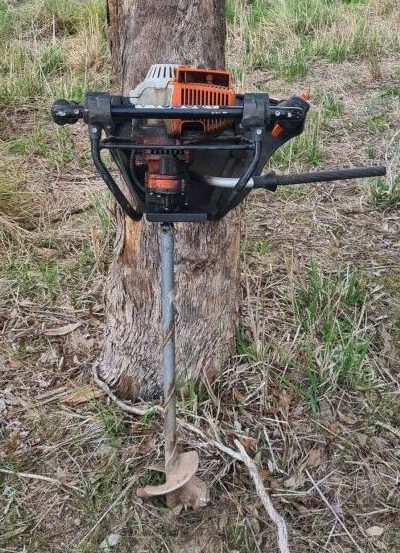
Petrol motor hand augers are an option where ripping is not an option. Photo: K. Durant/HLN
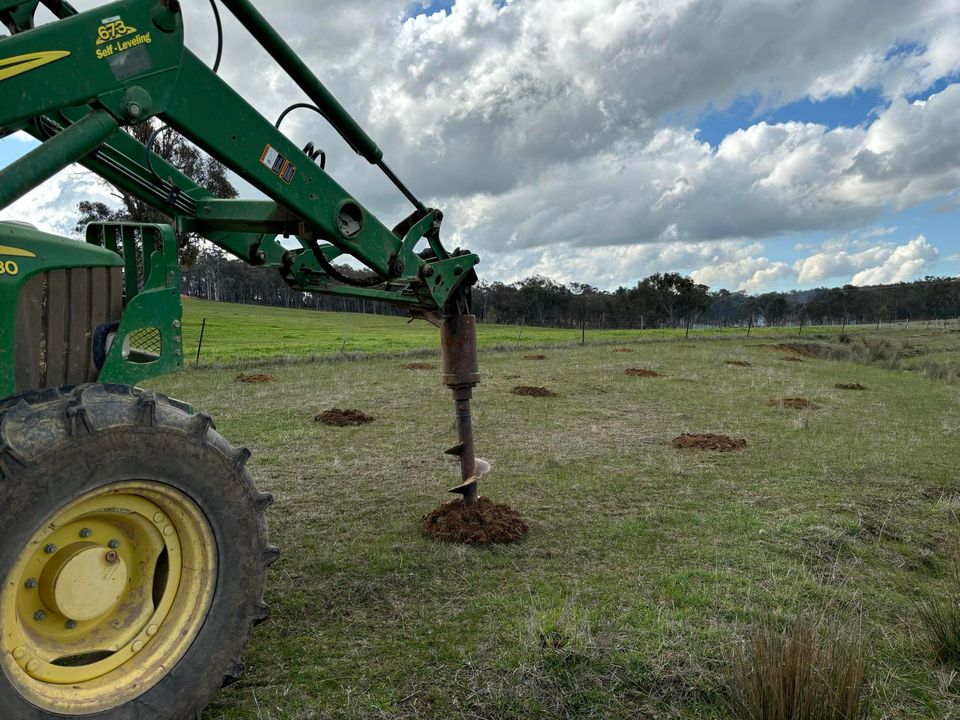
Post-hole diggers on the tractor. Photo: B. Chambers
Whatever the planter used you have to consider the soil type and timingaugering or using a pottaputtki in clay soil or any soil when the soil is too wet can result in a smooth-sided hole that impedes root growth. It must be done when the profile is dry.
Deplugging tool
Hikos need to be pushed out from the bottom with a tool or a blunt stick – a bamboo tree guard stake is good. This homemade tool can loosen whole trays at once, which makes removing plants from Hiko trays very efficient. Your Landcare group may have one you can borrow.
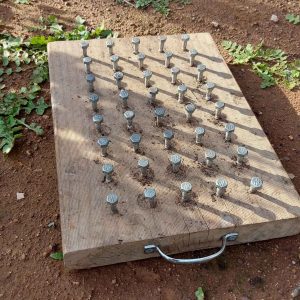
Example of a homemade ‘deplugging tool’. Photo: L Bull
Other equipment:
Ask your local Landcare group what equipment they may have for loan:
- kidney trays or buckets for carrying plants
- planting belts are available to carry Hiko trays
- tree guards and stakes on site (if you are using them) and a mallet to tap the stakes into the ground; if the site is well prepared you may be able to just push them in with a heavy gloved hand
- water cart if you are watering the seedlings.
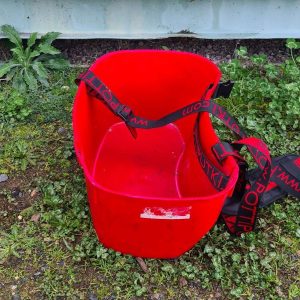
Kidney tray for carrying plants. Photo: HLN
Seedling preparation prior to planting
Plant as soon as seedlings arrive on site
Plants that are already stressed and sub-optimal before being planted – left on the verandah for two weeks – are a common cause of planting failure! Arrange to collect the plants or have them delivered from the nursery as close as possible to the planting date.
Water plants
Water plants very well before planting day and on the day of planting. If you soak them in a bucket, don’t leave them longer than an hour or so – you will de-oxygenate the root ball.
Loosen or remove tubes from seedlings
Do not pull on the plant to remove it. Hiko seedlings need to be loosened or removed from the tray. Contractors will generally do this themselves, but check with them.
- Hiko seedlings – push up from the bottom with a tool – (see Deplugging tool opposite)
- Forestry tubes – gently squeeze on the flat edges to loosen the plant, then tip up with the stem between your fingers and remove the tube.
Mix trees and shrubs
Either in the trays (if using Hiko planting belts) or in the bucket or kidney tray. If mixing in the Hiko trays, you can do this before the day yourself or the nursery may offer it for additional cost.
Plant your seedlings!
If you are laying out the plants ahead of the planters or removing them to a bucket or kidney tray, don’t get too far ahead of the planters – seedlings dry out quickly.
Contract Planting
Nurseries may offer this service, or there may be contractors in your region. In general, it takes the logistics out of planting for you, but you must have the site well prepared, and very clearly communicate the plant spacing and design you want.
Usually, the plants remain in the nursery and the contractor will bring them on site on the day of planting. Costs are generally at least the same as the cost of the plant.
If the contractor is different to the supplier of the plants, make sure you read Seedling preparation prior to planting.
Clearly explain to the contractor how you want the site to look:
- Describe the spacing of plants (see Plant densities above) – consider planting a few beforehand as an example, and then check in on progress.
- Pass on any specific instructions, e.g.,, do you want only shrubs in the outside lines closer to the fence?
- Ensure guards and stakes are on site if you are using them.
Without guarding, an experienced contractor could be expected to plant up to 2000 plants per day with pottiputkis or special planting shovels, in perfect site conditions. Ask your contractor for a quote.
COMMUNITY OR GROUP PLANTING
Your revegetation site can be planted by yourself, your family, friends, as a community event or using contractors or paid help. Here are some tips for your planting day:
- read Seedling preparation prior to planting
- spacing – clearly communicate what you want (see Plant densities above)
- the number of steps between plants is often easiest (but remember kids and adults are different sizes)
- you may be able to use fence posts as markers if they are spaced appropriately
- consider planting a few seedlings beforehand or laying out the plants or guards ahead of the planters yourself
- mix seedlings in the carrying trays or buckets to reflect where and what you are planting; mix the trees and shrubs in the ratios you are aiming for; or have some people dedicated to planting trees and others shrubs
- demonstrate how you would like the plants planted, particularly if using the pottiputkis, and how to put on guards if required
- delegate – often having designated ‘teams’ that follow one another – laying out, digging, planting, guarding, watering – improves efficiency and consistency
- look after your planters – have a person designated to organise and prepare catering for the group; schedule breaks and food arrival – hungry people wander off – also consider toilet and handwashing facilities.
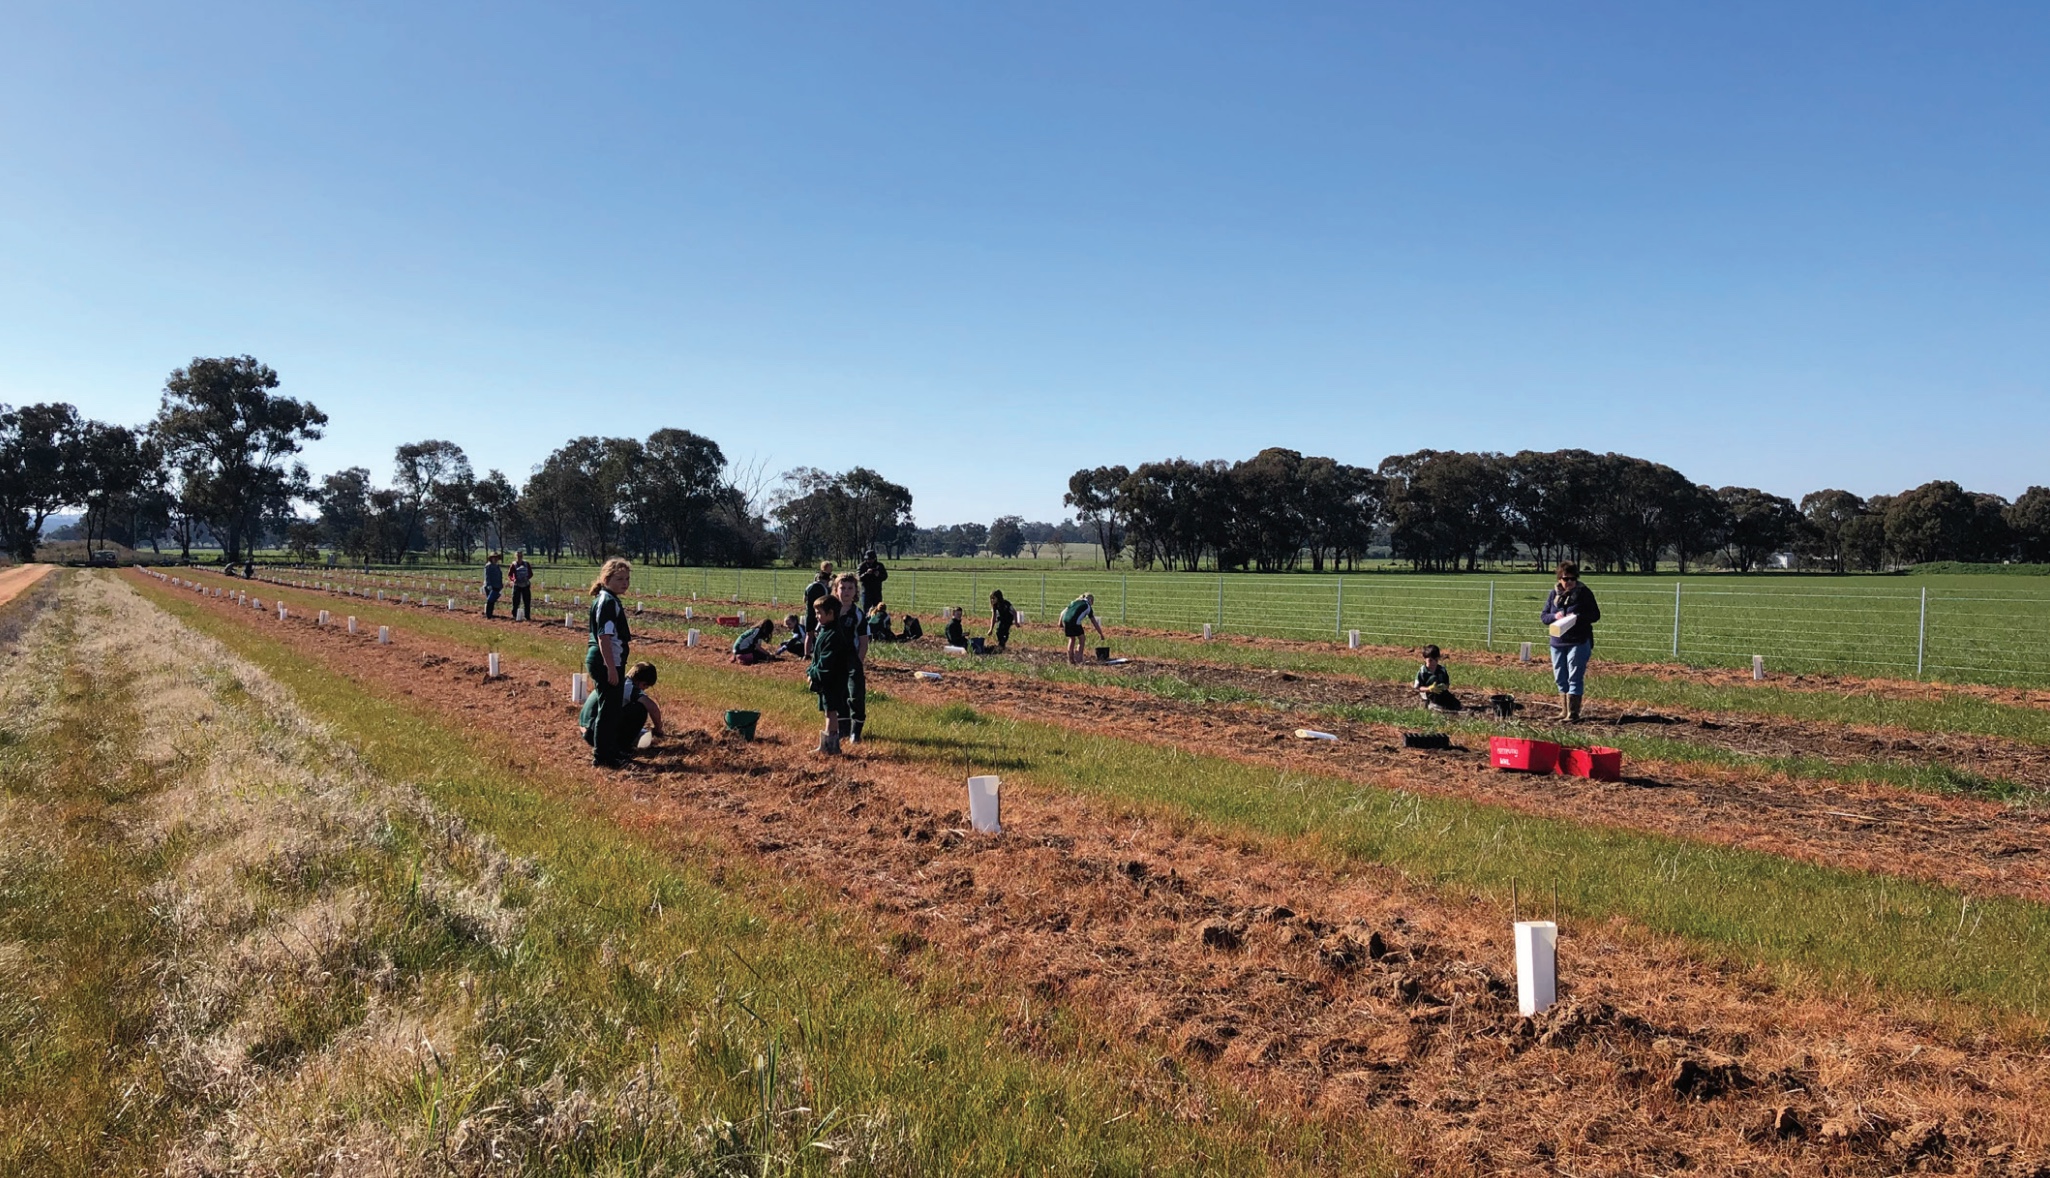
Group plantings make memories and involve your friends and family in your revegetation. Photo: L. Bull.
Without guards, the average person can plant 300 to 400 plants per day on a well-prepared site.
DIRECT SEEDING
Here are the main activities required before direct seeding.
Groundcover (or biomass) control – Reduce the groundcover (or biomass) either by grazing, mowing or slashing. Please note, if your site is of high biodiversity value, consider that grazing can have a detrimental effect on the disturbance of the leaf litter. Slashing direct seedling lines would be a better option. Cool burns may also be used as a tool to reduce groundcover levels prior to seeding.
Knockdown spray – Spraying along the proposed seeding lines is recommended following the autumn break prior to direct seeding, although some direct-seeding contractors can spray the direct seeding lines as they are sowing. Spraying an insecticide to control red legged earth mites is another consideration. Consult your contractor for localised advice.
Residual chemicals – Do not use any residual chemicals to control weeds prior to direct seeding as these will have a detrimental impact on seed germination and survival rates.
Pest control (rabbits and hares) – Pest control prior to planting is fundamental to the success of direct seeding.
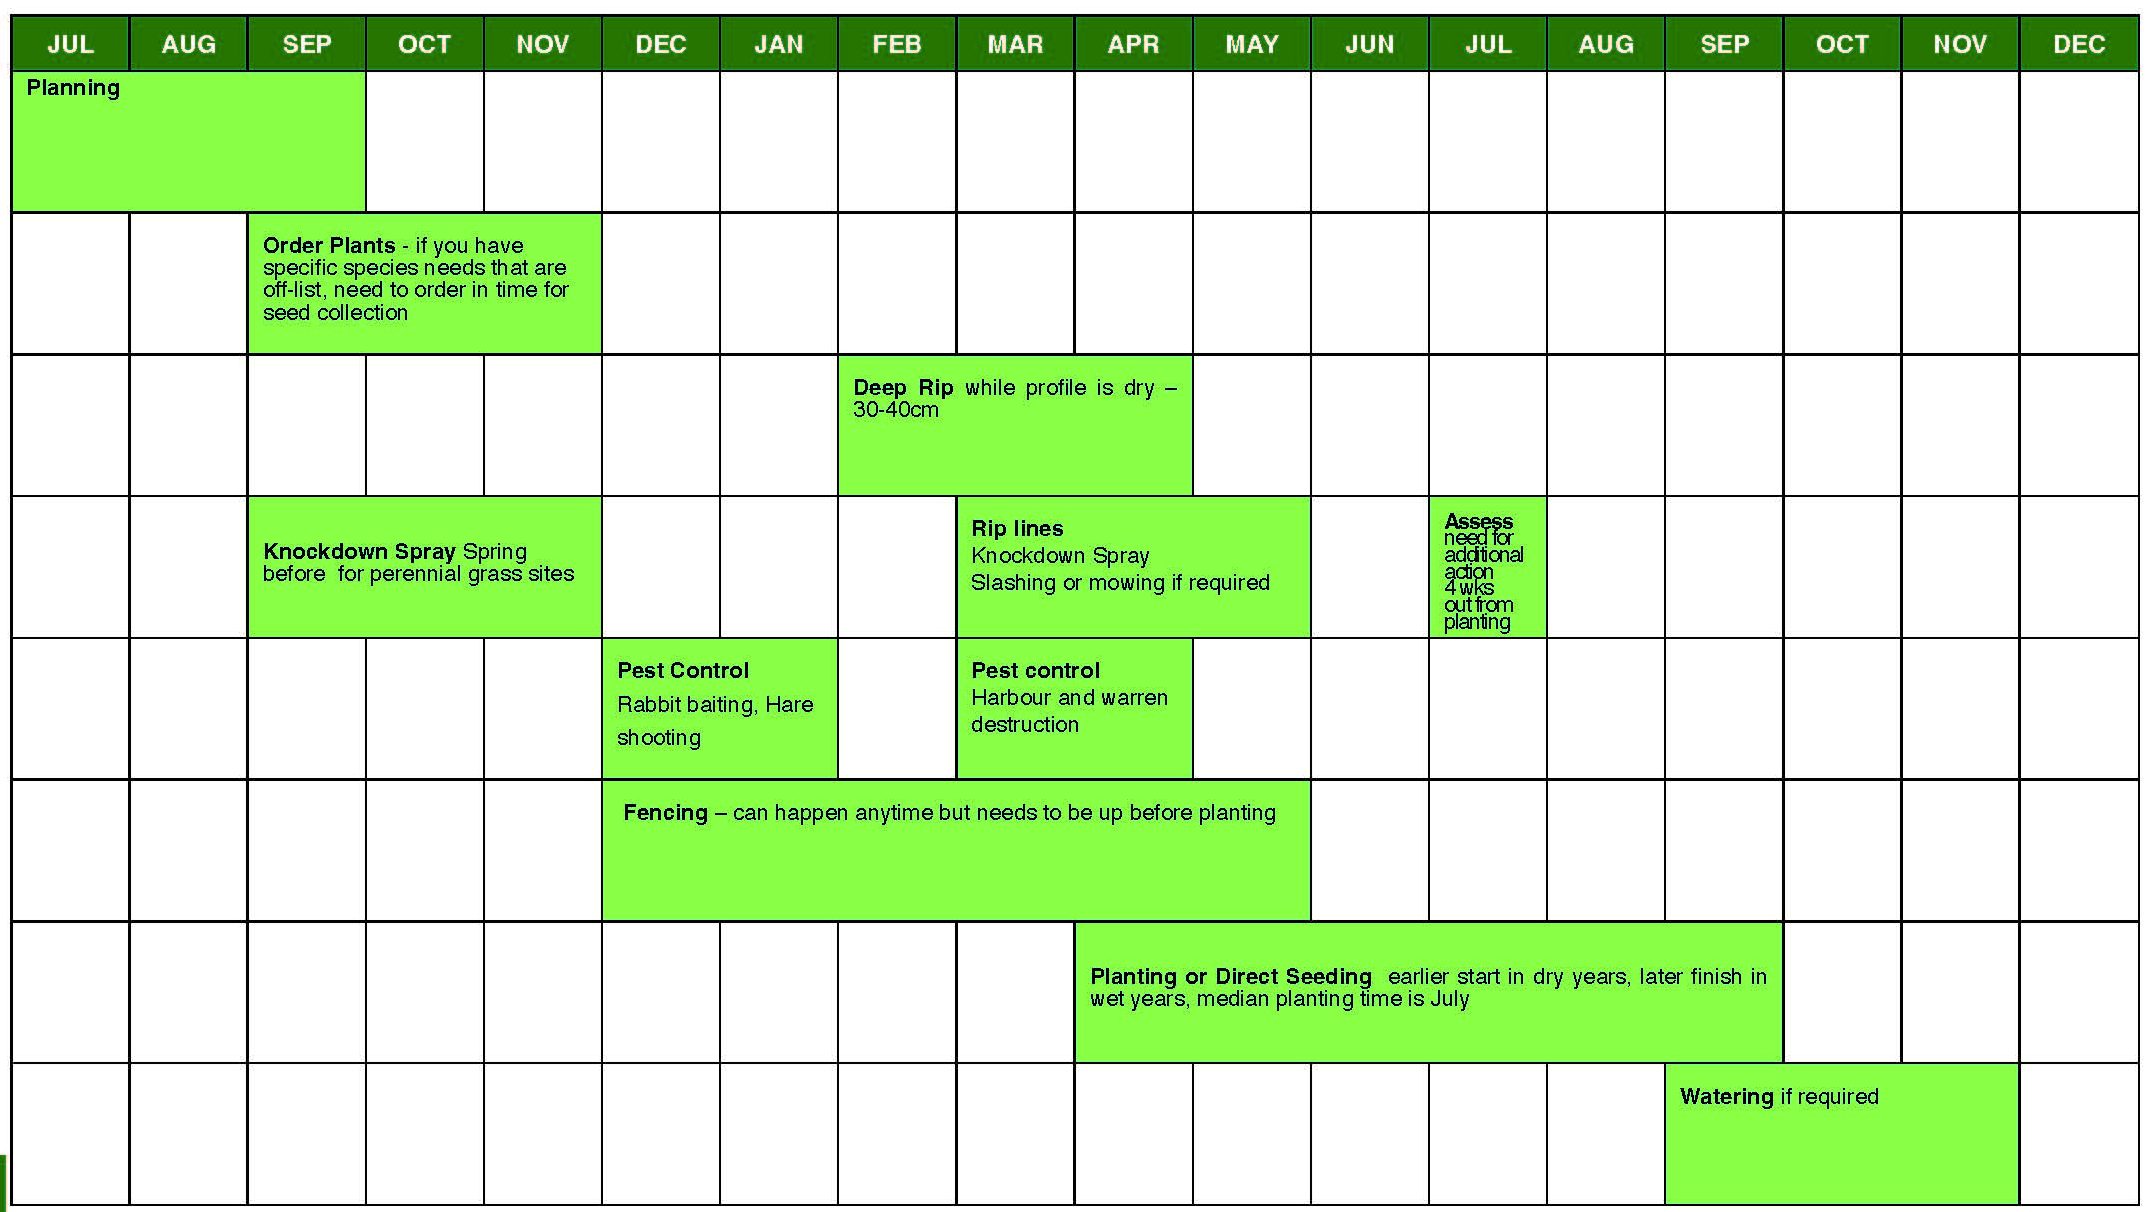
Generalised Revegetation Calendar
There are great localised resources available for some areas – ask your Nursery, Landcare or regional natural resource managment agency.
Find out more…
Holbrook Landcare Network – https://holbrooklandcare.org.au/holbrook-landcare-revegetation-guide/
Murray Local Land Services – https://www.lls.nsw.gov.au/regions/murray/programs-and-projects/murray-seed-services/thinking-of-planting-or-seeding-native-vegetation-start-planning-now. https://www.lls.nsw.gov.au/__data/assets/pdf_file/0003/1277517/8340_PPW_LLSPlant-your-patch_compressed.pdf
Local Land Services – https://www.lls.nsw.gov.au/__data/assets/pdf_file/0006/1456332/Revegetation-and-planting-tips-and-tricks-WEB.pdf
Murrumbidgee Landcare Incorporated – https://mli.org.au/wp-content/uploads/2022/07/A5-Seed-Collection-Guide-Complete.pdf

